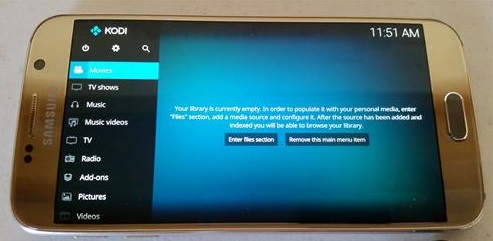
Kodi is a very popular media center that, when combined with Add-ons, allows for streaming all kinds of content such as TV shows and movies.
In the past, Kodi was confined to a media center box such as a dedicated computer. Now Kodi can be installed on an Android phone or tablet, and play the same media anywhere bandwidth is available to stream content.
Kodi 20 Nexus is the newest version to be released and has some major updates and interface changes.
Kodi should install on any Android smartphone or tablet that has at least Android 5.0 Lollipop or higher installed.
To install Kodi on an Android phone or tablet and watch a TV Show/Movie is a two-step process.
First, we need to install Kodi then we need to install a program called an Add-on to stream the content.
Be sure to be connected to a WiFi signal unless you have an unlimited data plan, as streaming movies use a lot of bandwidth and data.
Below are written step-by-step instructions for how to do both first installing Kodi and then the popular Crew add-on.
Steps For Installing Kodi To an Android
The first step is to install Kodi from the Play Store or from the Kodi site.
It is much easier and automatic to install from the Play Store than the Kodi download page, but either option will work.
Once Kodi is installed on your Android, add-ons need to be added to Kodi to stream content.
Below are the full steps to enable unknown sources and install the popular Crew add-on.
Steps to Setup Unknown Sources in Kodi 20 Nexus
Kodi Matrix needs a box checked called Unknown Sources to install add-ons.
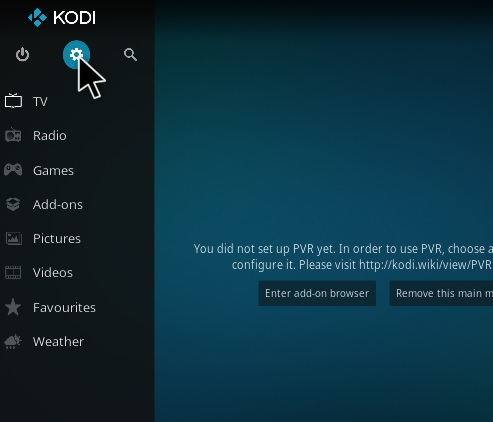
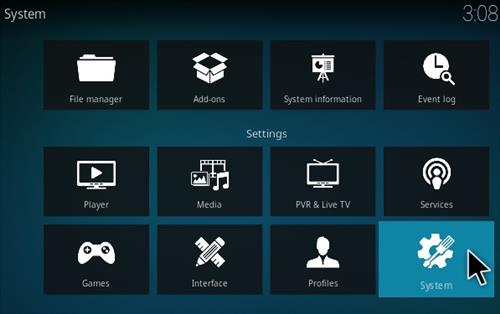
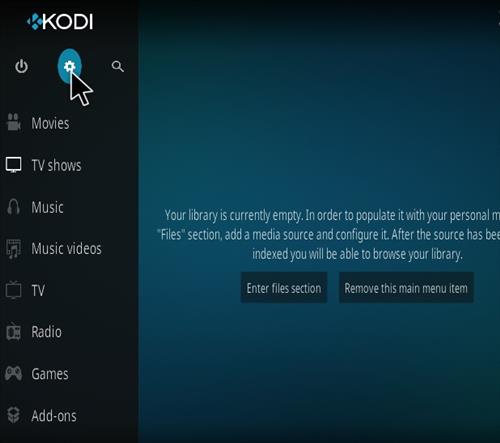
- Click the Settings Icon in the top left corner
- Settings
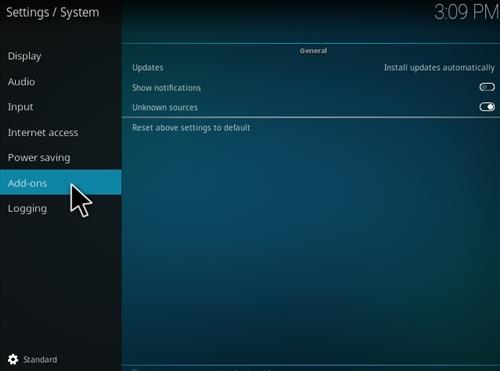
- Add-ons
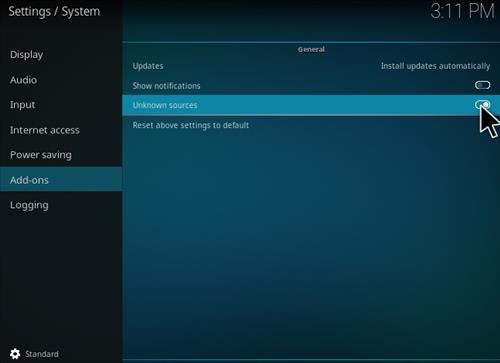
- Turn ON Unknown Sources
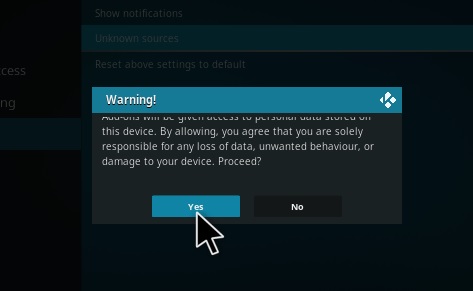
- A warning box will come up click Yes
Keep in mind there are many add-ons and it is best to have a few if one stops working.
Read Here To See a List of the Current Top Kodi Add-ons
Using a good VPN with Kodi is always suggested for privacy, security, and being anonymous. If you need a good low-cost VPN to use with Kodi, Try NordVPN; it has multiple high-speed servers with no throttling or logs.
*WirelesSHack.org is not affiliated with Kodi, or any Addons or Builds. WirelesSHack.org is a news and informational site which does not support or condone copyright infringement. Kodi should only be used with content that is bought and owned personally or is in the public domain.
How To Install The Crew Addon Into Kodi
- At the top left click the System Settings (Gear Icon)
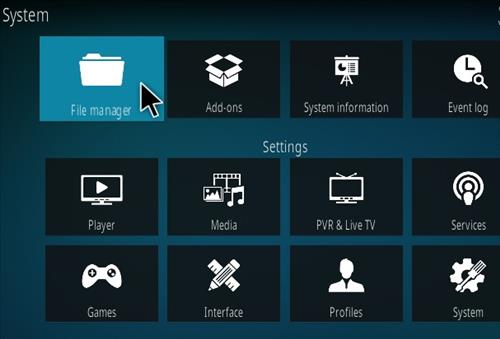
- Click File Manager
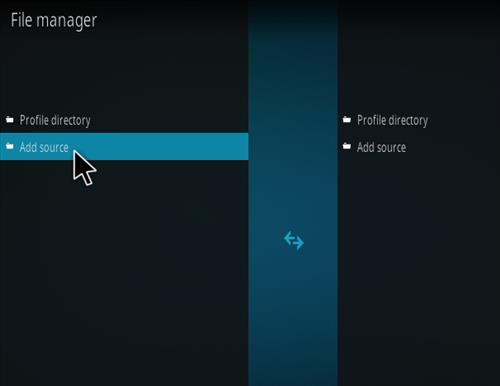
- On the left click Add Source
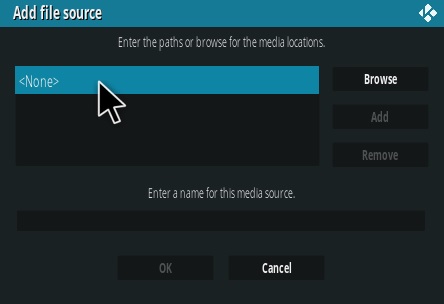
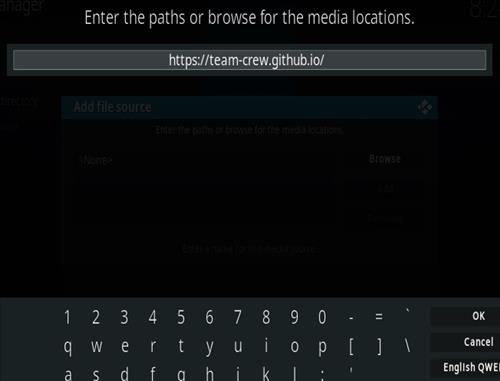
- Click where it says NONE
- Type in the URL: https://ift.tt/c7B4Ntp
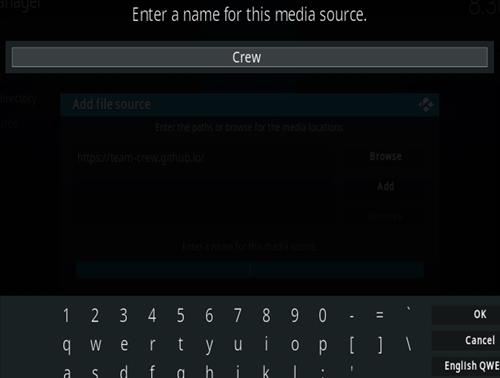
- In the next box down name it Crew and click OK
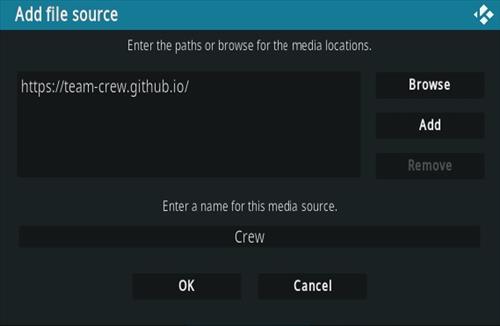
- Double check everything is correct and click OK
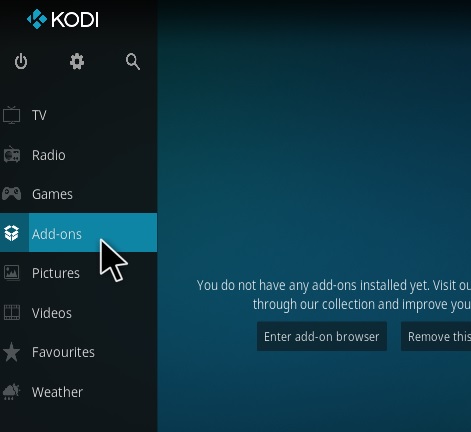
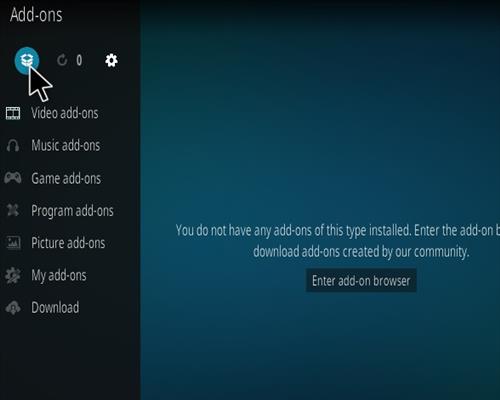
- Go back to the main menu and click Add-ons
- Click the Add-on Package Installer Icon at the top left
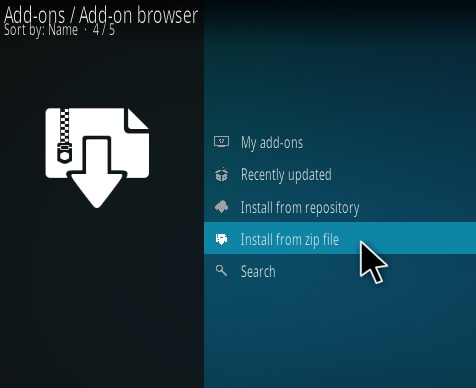
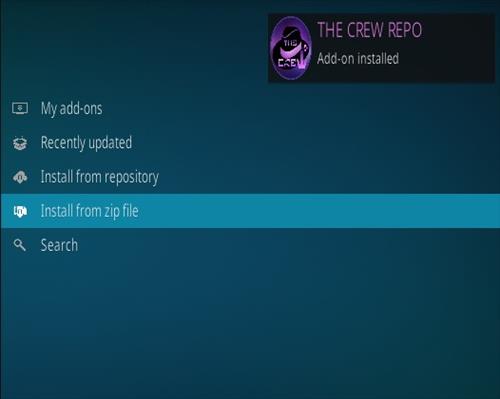
- Click Install from zip file
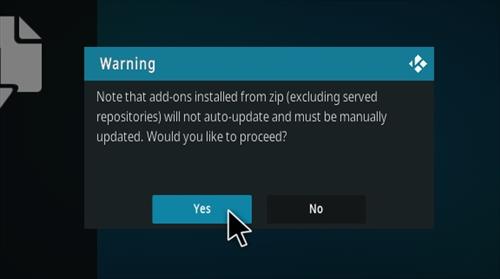
- Click OK on the Warning popup and be sure Unknown Sources is set to on
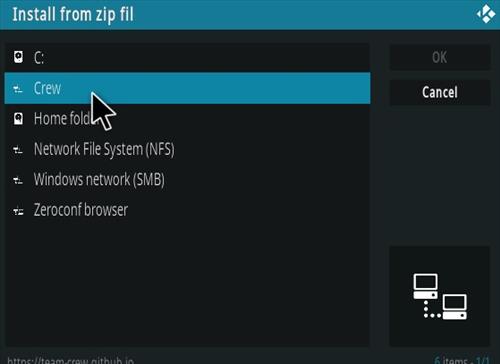
- A box will pop open select Crew
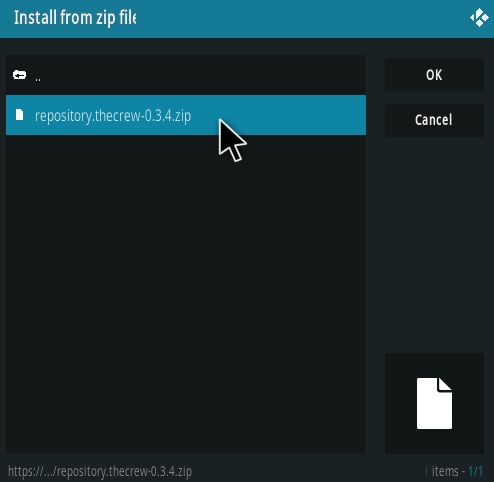
- Click repository.thecrew-0.3.4.zip
- Wait for the Repository to download and popup at the top right and say The Crew Repo Installed
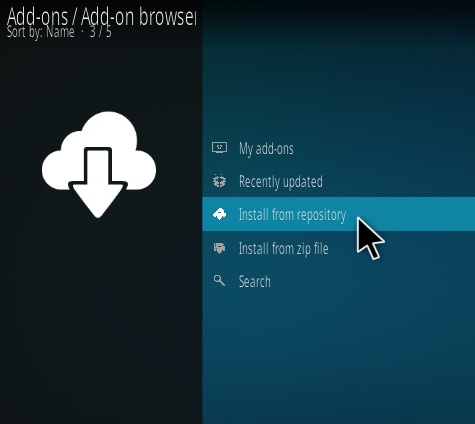
- Click Install from repository
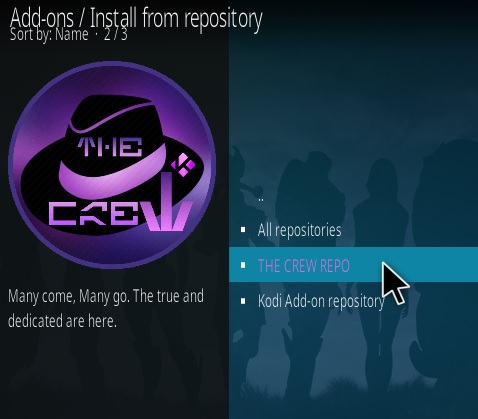
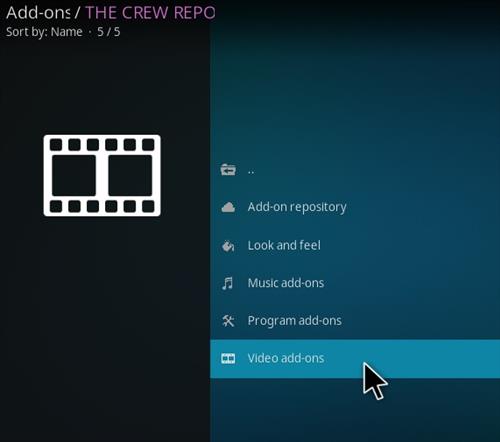
- Click The Crew Repo
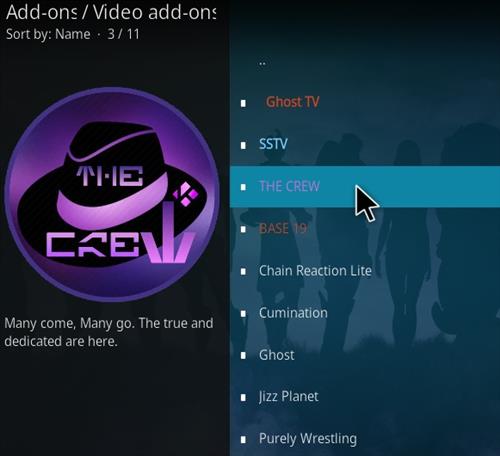
- Select Video Add-ons
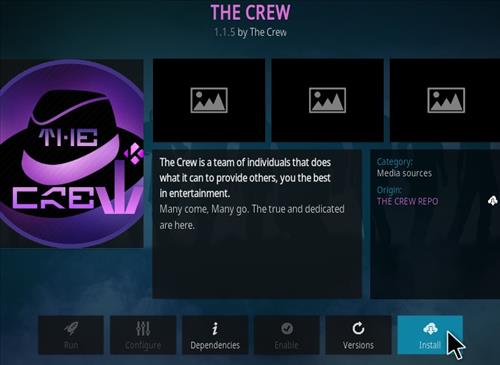
- Click The Crew
- Click Install
How to Stream A Video With The Crew and Kodi
After The Crew add-on is installed it will be located from the main menu under Addons–>Video Add-ons.
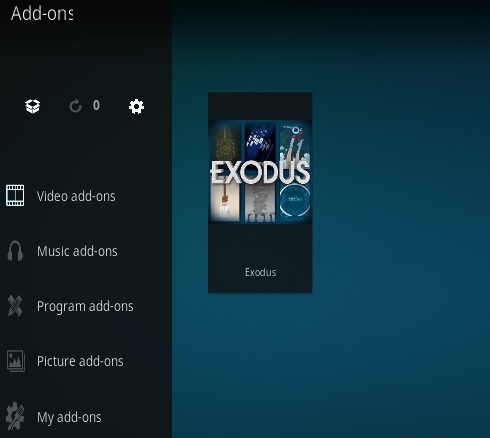
Finding a movie or TV show within the Crew is easy to do; what confuses most is how the servers work.
Once a video is selected to play a server list will come up with available streams. The Crew will take 10-30 seconds to pull in all the best server links.
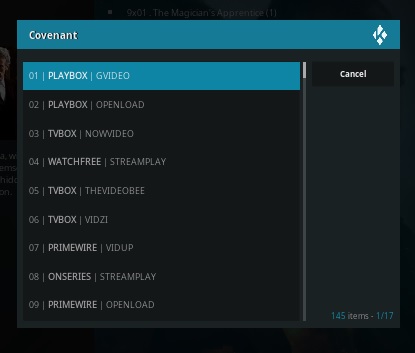
Servers can become full and kick a connection or start to buffer, if this happens simply move on to another server.
Sometimes 4-5 servers will need to be tried before a good one is found.
The servers are simple enough to understand, basically if one becomes full and doesn’t allow any more connections, then a server that is not full needs to be found.
0 Commentaires