The following tutorial will show you How To Install SafeKodi on any Kodi device you prefer.
SafeKodi is a Kodi addon that has the ability to scan installed addons for malicious content, viruses, and ads.
SafeKodi can be used to test all Kodi addons you currently have installed on your device.
The guide below will show you how to use SafeKodi to scan stand-alone addons as well as Kodi builds.
Each addon will then be labeled as safe, unsafe, or possibly containing ads.
SafeKodi also has the ability to quickly disable any addons that contain malicious content or adware.
If you are looking to scan APKs and other standalone apps for viruses/malware, check out VirusTotal.
Use the guide below to learn how to install SafeKodi and use it to scan your Kodi addons and builds.
How To Install SafeKodi
Below, you will find a screenshot guide for how to install and use SafeKodi on your preferred streaming device.
In this instance, we are using a Fire TV Stick 4K. However, this will also work for any device that supports the Kodi software.
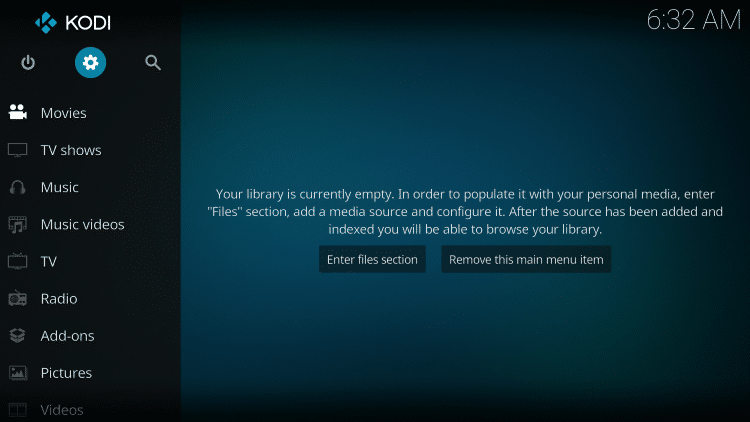
1. Click the Settings icon
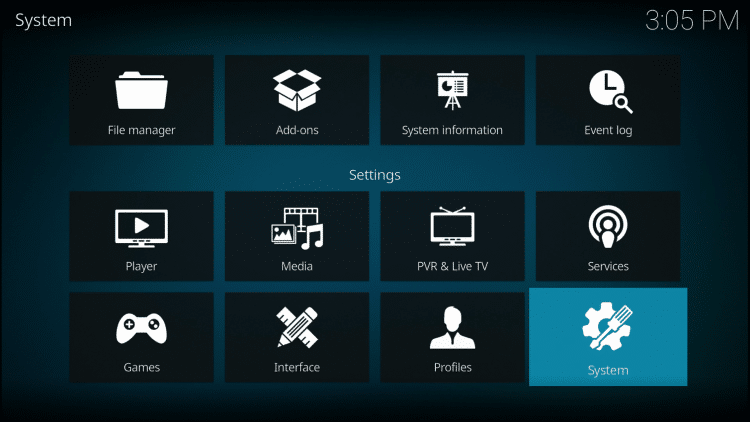
2. Click System settings
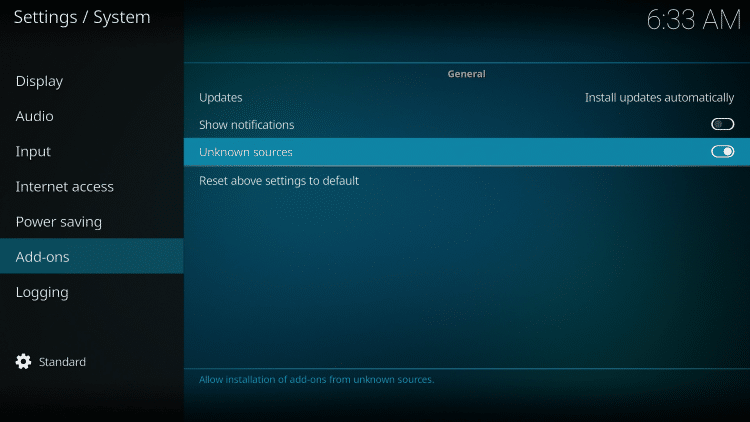
3. Turn on Unknown sources
Then go back to the previous screen by clicking the back button on remote
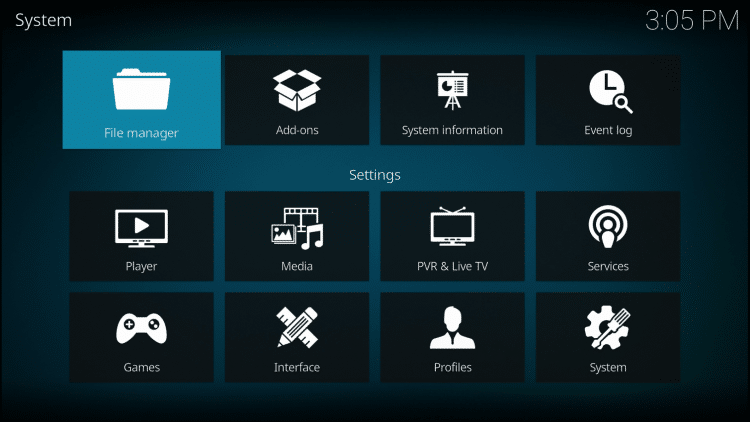
4. Click File manager
5. Click Add source
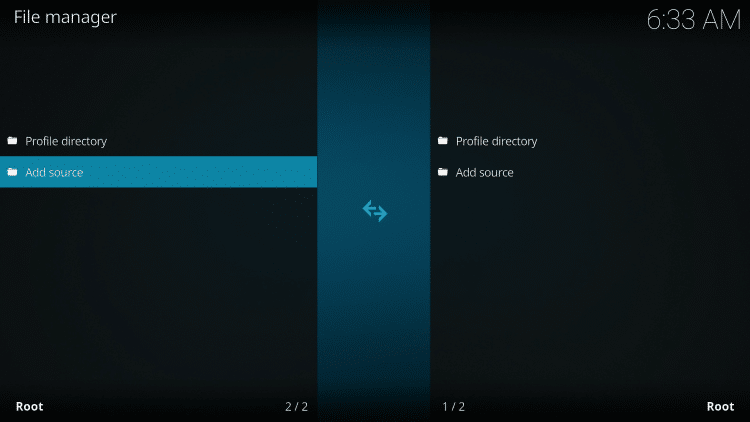
6. Click <None>
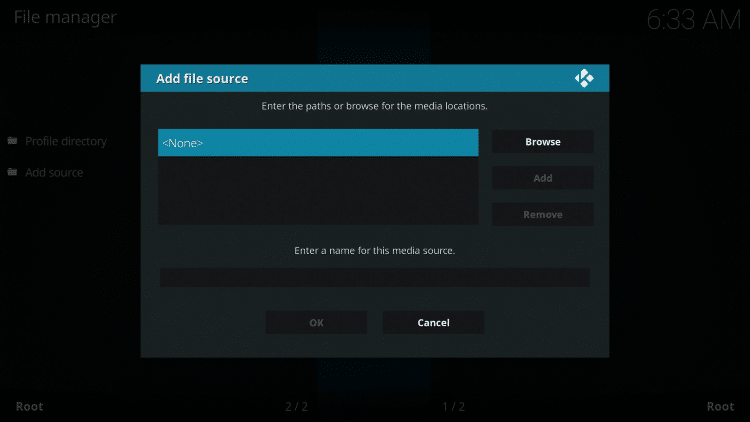
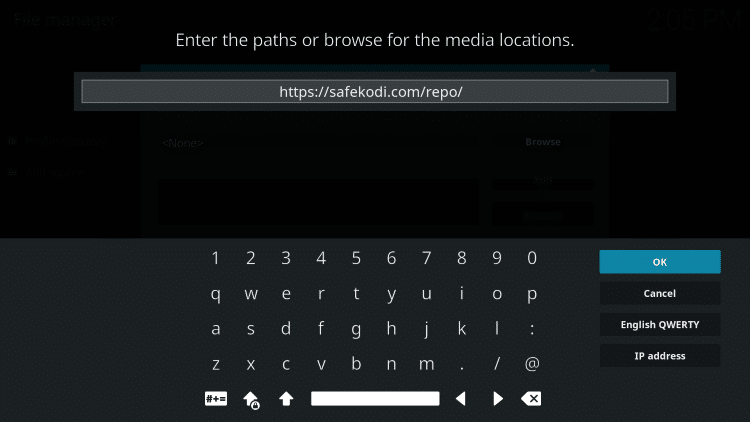
7. Type in the following URL exactly as it is listed here: https://ift.tt/3lQlhwM and click OK
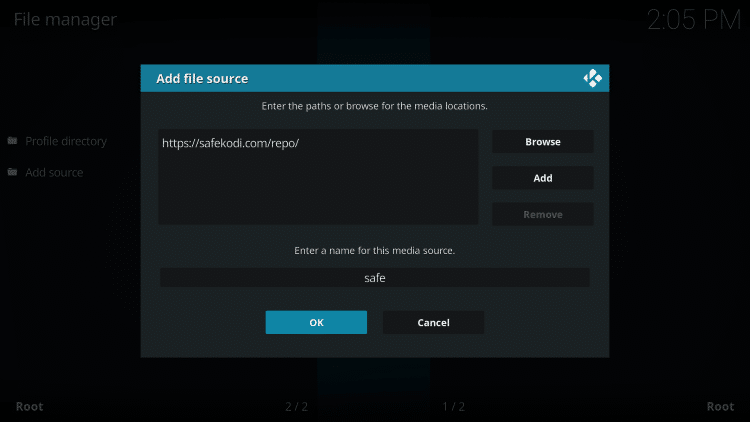
8. Name the media source safe or another name you prefer and click OK
9. Return to System screen and select Add-ons
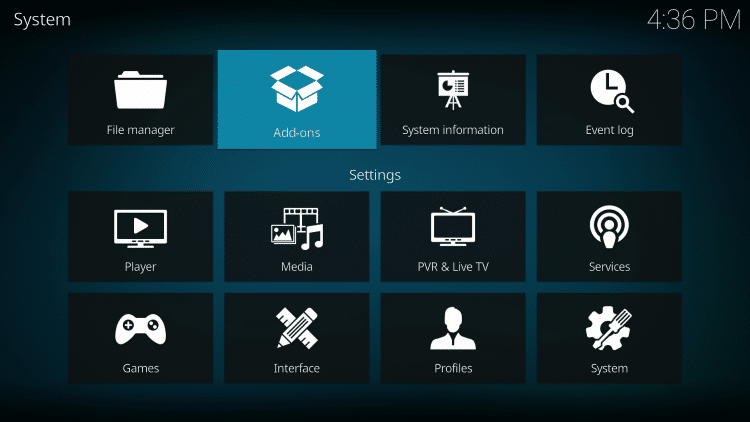
10. Click Install from zip file
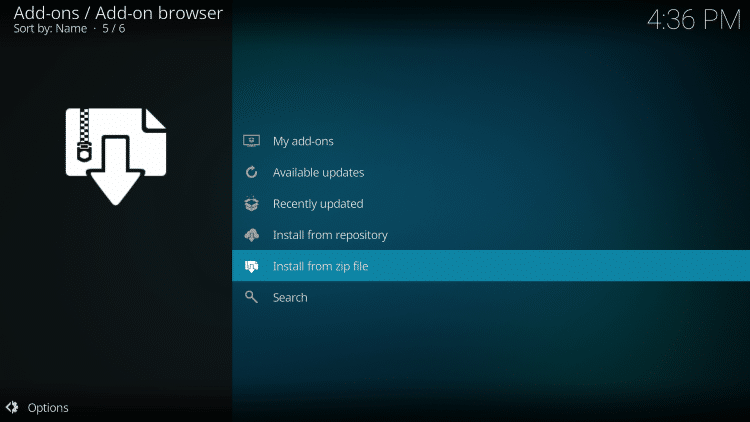
11. Choose safe or other name given to the media source
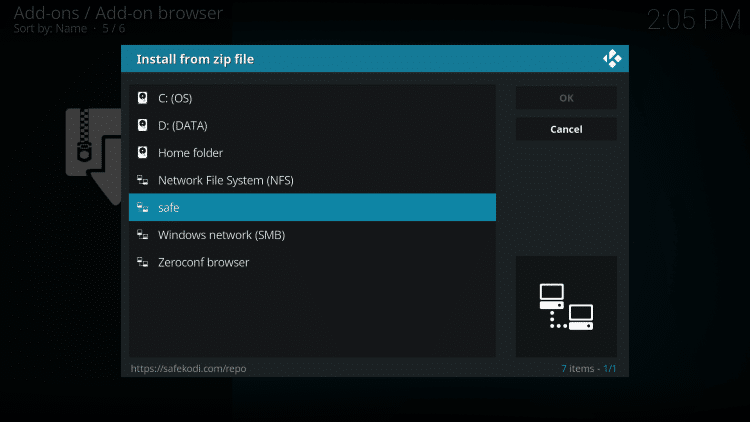
12. Click script.safekodi.zip
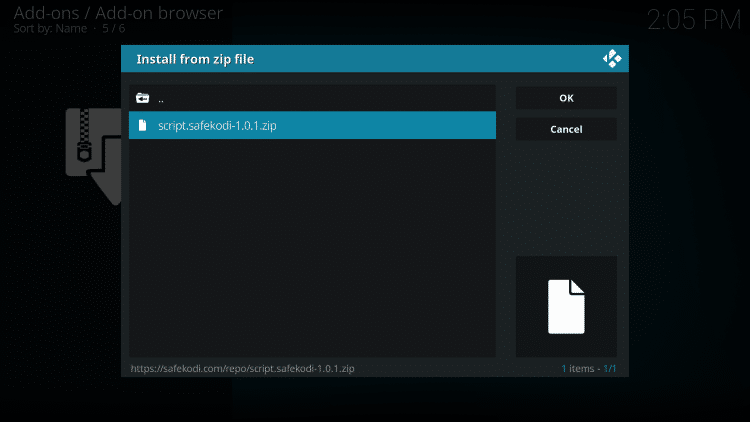
13. Wait for the SafeKodi addon installed message to appear
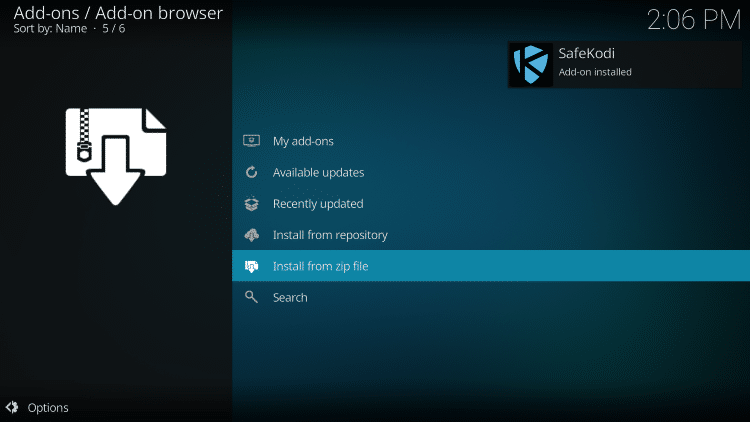
Installation is now complete! Follow along to learn how to use SafeKodi and how to install SafeKodi within a Kodi build.
Your online activity is actively tracked by your Internet Service Provider, app/addon devs, and government through your identifying IP address.
Stream anonymously by using IPVanish VPN.
IPVanish will encrypt your connection to the Internet and mask your IP address so you will remain 100% anonymous.
SAVE UP TO 73% WITH THIS EXTENDED CYBER MONDAY DEAL
IPVanish backs their service with a 30-day money back guarantee.
IPVanish allows you to use your account on unlimited Internet-connected devices
How To Use SafeKodi
1. Return to Kodi home-screen and under Program addons, launch SafeKodi

2. Click No or Yes if you would like to submit anonymous data

3. SafeKodi will begin to scan your installed addons

4. When finished, your screen will look like this
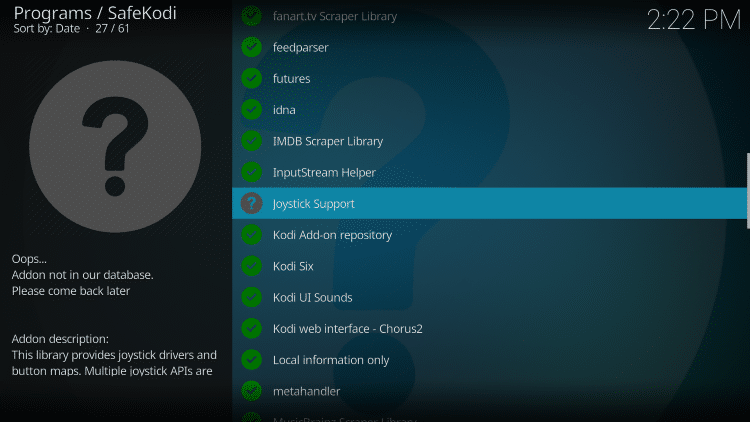
Each addon will return one of the following results:
- Green Check Mark – Addon is safe for use
- Question Mark – Addon not in the database, unable to verify safety
- Red X – Addon may contain malicious content or adware
How To Install SafeKodi within a Kodi Build
If you are one of the millions of Kodi users with a build installed on your device, we can still run SafeKodi and check addons within your preferred build.
The guide below will show you how to do so by changing your interface back to the original Kodi skin. This will allow us to use SafeKodi to scan for viruses and more.
The screenshots below are taken with the Xanax build installed. However, this will work for nearly all builds.
1. Launch Kodi with your build installed and open Settings

2. Click Interface
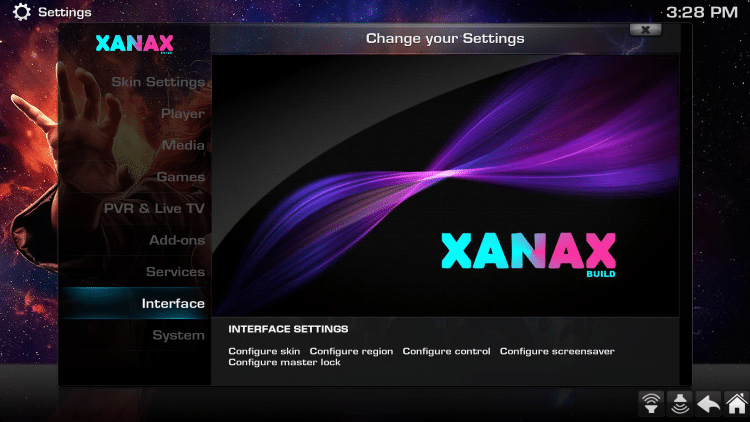
3. Hover over Skin Tab and click Skin to change Kodi interface

4. Choose Estuary
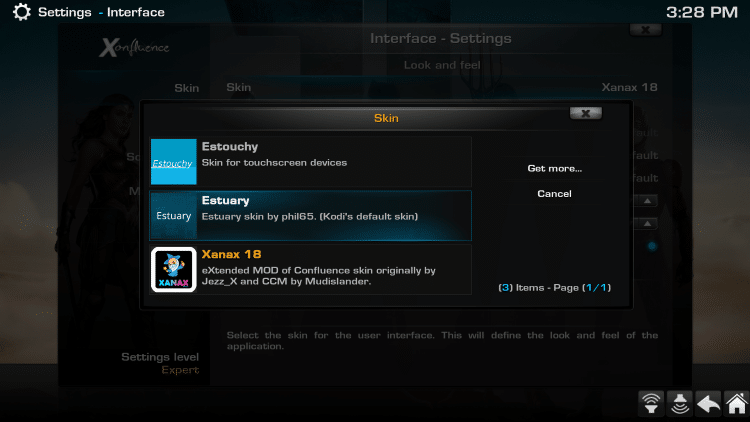
5. When prompted, click Yes
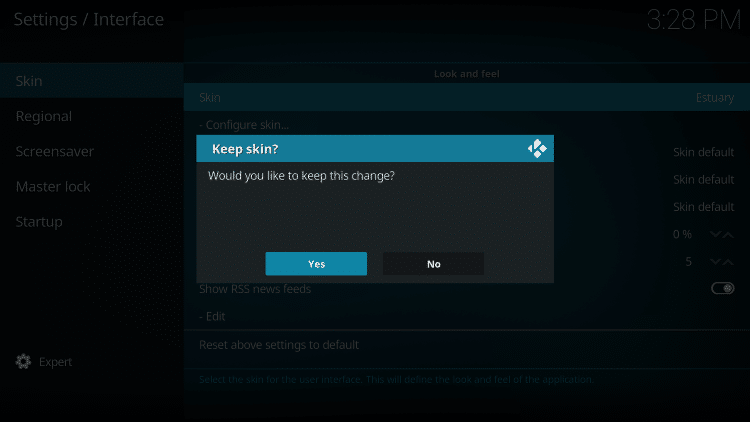
6. Launch Settings and choose File Manager

7. Click Add Source
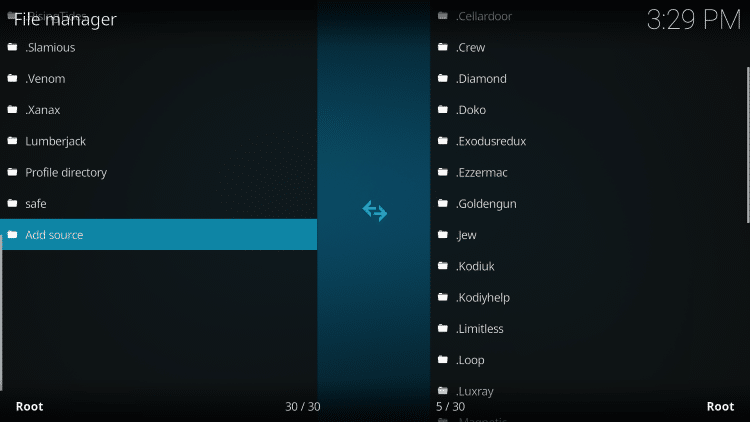
8. Insert the SafeKodi url as shown here: https://ift.tt/3lQlhwM and click OK

9. Name the media source safe or other name your prefer and click OK

10. Return to System screen and select Add-ons

11. Click Install from zip file

12. Choose safe or other name given to the media source

13. Click script.safekodi.zip

14. Wait for the SafeKodi add-on installed message to appear

15. Return to the home screen and under Program addons, launch SafeKodi

16. Click No or Yes if you would like to submit anonymous data

17. SafeKodi will begin to scan your installed addons

18. When finished, you will see the following screen
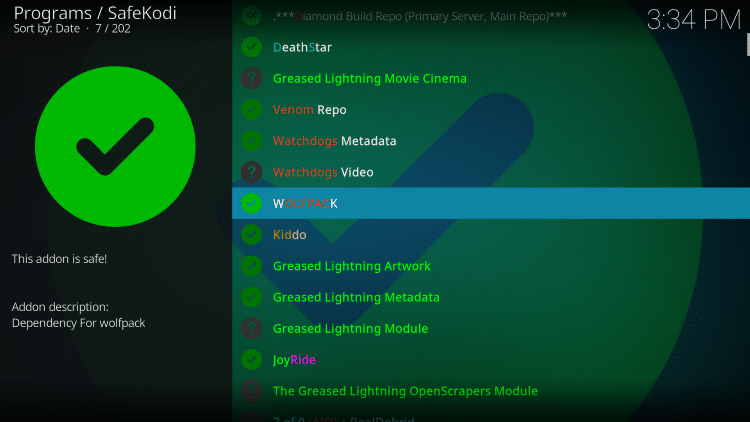
19. If SafeKodi finds an unsafe addon it will look like this:
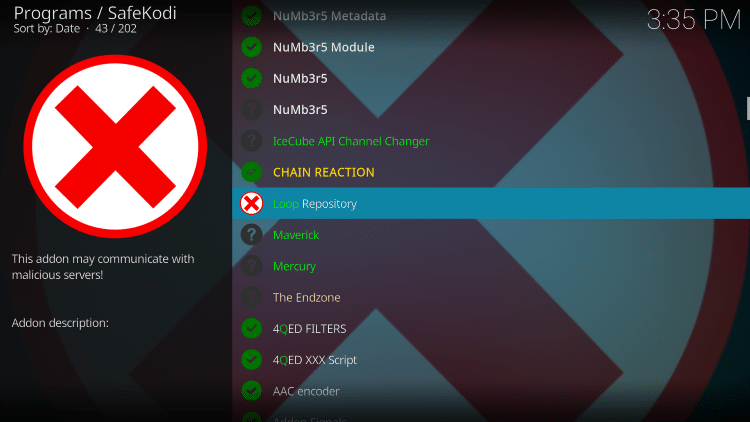
20. Luckily, SafeKodi has a built-in feature that allows you to disable unsafe addons. Click the addon and choose Yes if you want to disable an addon
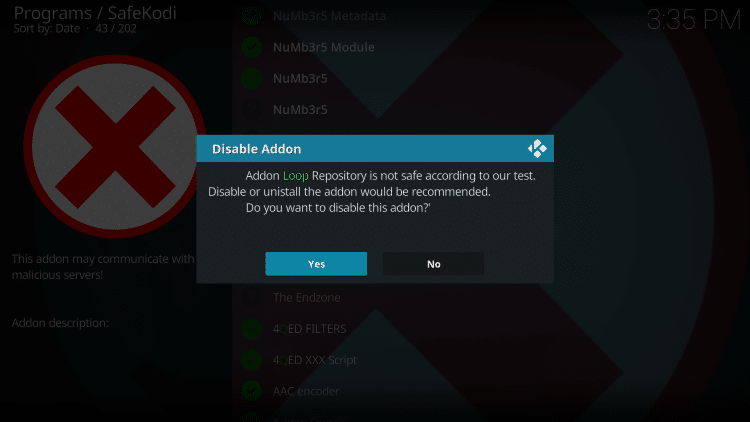
21. Click Ok
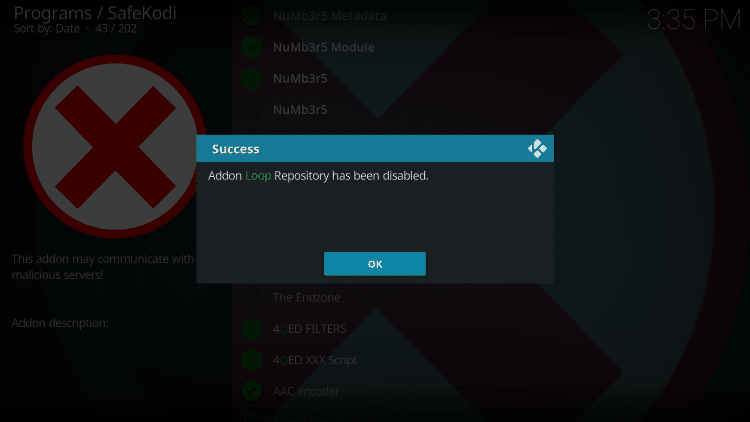
The unsafe add-on has now been disabled!
If you want to uninstall any addons that you find are unsafe completely, you can also do so:
To change the Kodi skin back to Xanax or other build skin, follow the steps below:
- From the Kodi home-screen choose Settings
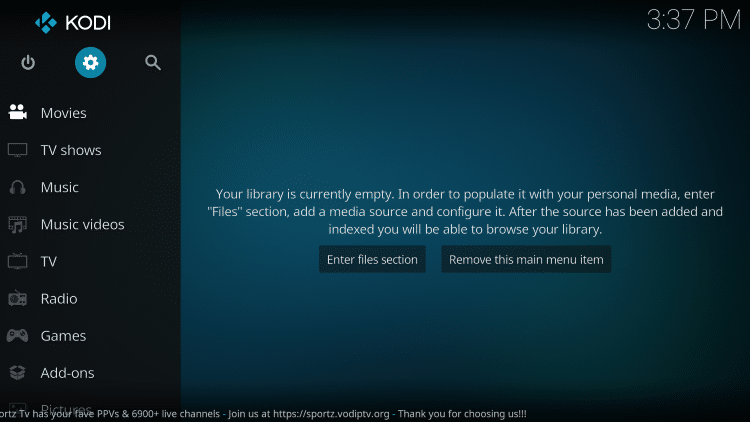
- Click Interface
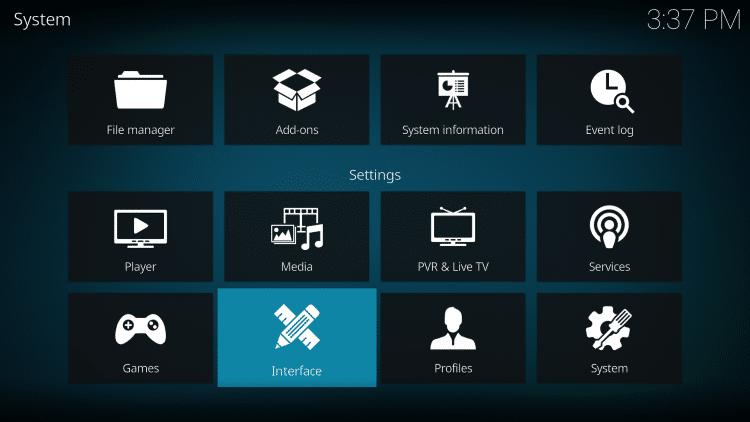
- Hover over Skin Category and select Skin
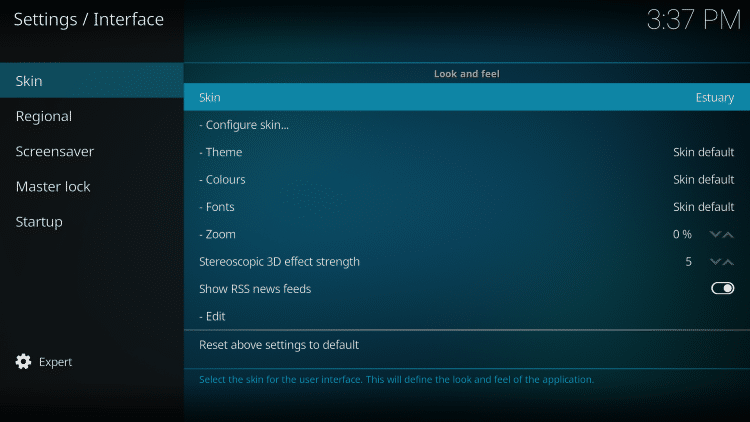
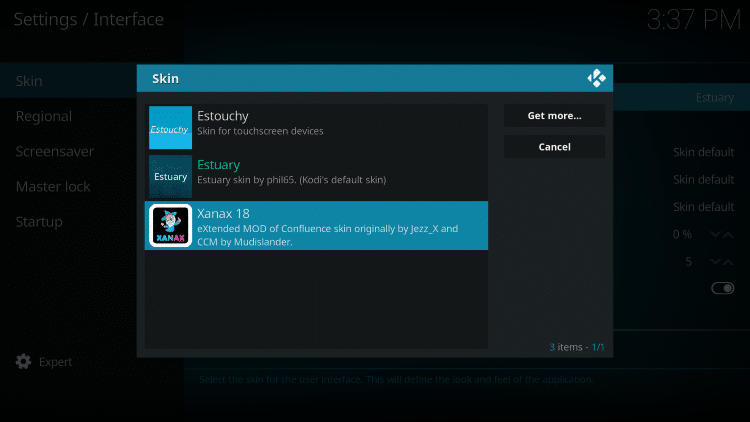
- Choose Xanax Skin or other Skin associated with your build
- When prompted, click Yes
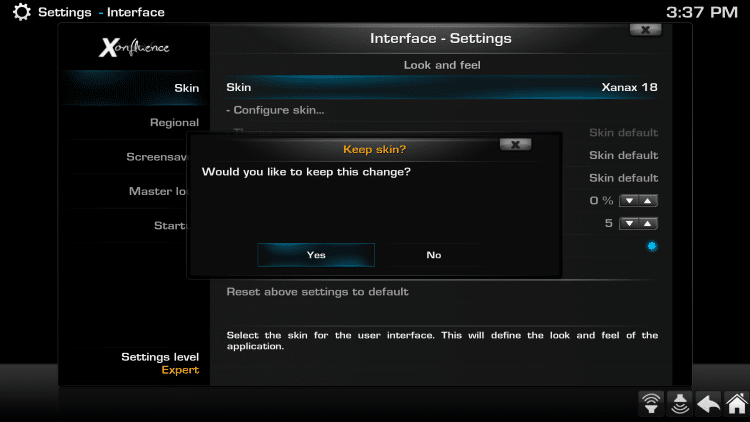
That’s it! You will now see the original build interface on your Kodi device.
Features & Details
SafeKodi was formed by a group of researchers at Northwestern University and Brave Inc.
The project aims to inform Kodi users about addons that contain potentially malicious content.
This can be a virus, malware of some sort, or unwanted ads. Their website states the following:
SafeKodi’s database is continuously updated with de-Kodi, a Kodi crawler which is capable of discovering and testing large cross-sections of Kodi’s decentralized ecosystem at tunable levels of depth and breadth. With de-Kodi, we discovered and tested over 9,000 distinct Kodi addons..
For complete safety and privacy when using Kodi, we strongly recommend a VPN in conjunction with SafeKodi.
This will ensure your activity is not visible to your ISP or anyone else.

0 Commentaires